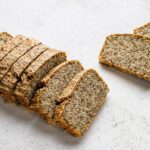
This quinoa and chia seed loaf is inherently gluten-free, and tastes amazing toasted and spread with a dollop of chia seed jam. It’s equally delicious dunked into a bowl of pea soup for a simple lunch option.

Quinoa and chia seed bread ingredients
- Quinoa: I used white quinoa for this recipe.
- Chia seeds: Make a gel with these overnight.
- Sea salt: For flavour.
- Baking powder: To help the bread rise. Look for aluminium-free, and gluten-free if you’re following a gluten-free diet (check labels as it won’t always be obvious).
- Maple syrup: To sweeten slightly. Use honey if you prefer.
- Olive oil. I recommend a good quality olive oil like Erbology extra virgin olive oil – use the charlotte15 at checkout for 15% off.
- Filtered water: If you don’t have a water filter just use tap water instead.
How to make quinoa chia seed bread
A simple recipe to make, just remember to allow soaking time. It’s easiest to soak the quinoa and chia seeds before bed. Make this loaf in three easy steps:
- Soak the quinoa and chia seeds: Place the quinoa in a large bowl, cover with filtered water and refrigerate overnight (or for at least 6 hours) to soak. Drain and rinse thoroughly. Place the chia seeds and water in a separate container, cover and refrigerate overnight (or for at least 6 hours) to make a gel.
- Mix: Before you get started, preheat the oven to 180°C (350°F) and grease and line a 21 x 11cm (900g/2lb) loaf tin with plastic-free baking parchment. Then, place the quinoa, chia gel, salt, baking powder, maple syrup, olive oil and water in a food processor and process to a batter-like consistency.
- Bake: Pour into the prepared tin and bake for 90 minutes. Allow to cool in the tin for 5 minutes before transferring to a wire rack to cool completely.
That’s it! Slice once completely cool.
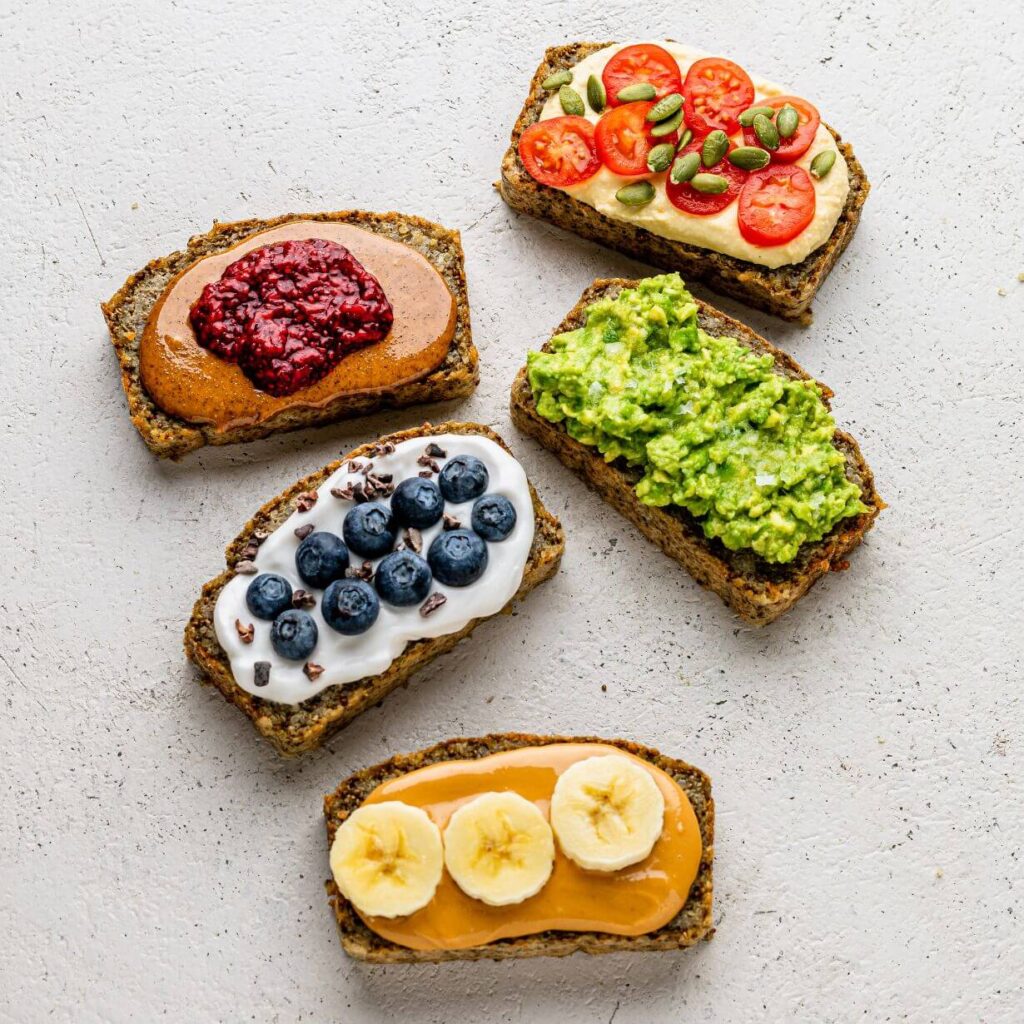
Quinoa and chia seed bread toppings
There’s nothing like a slice of bread with delicious, healthy toppings. Here are some ideas:
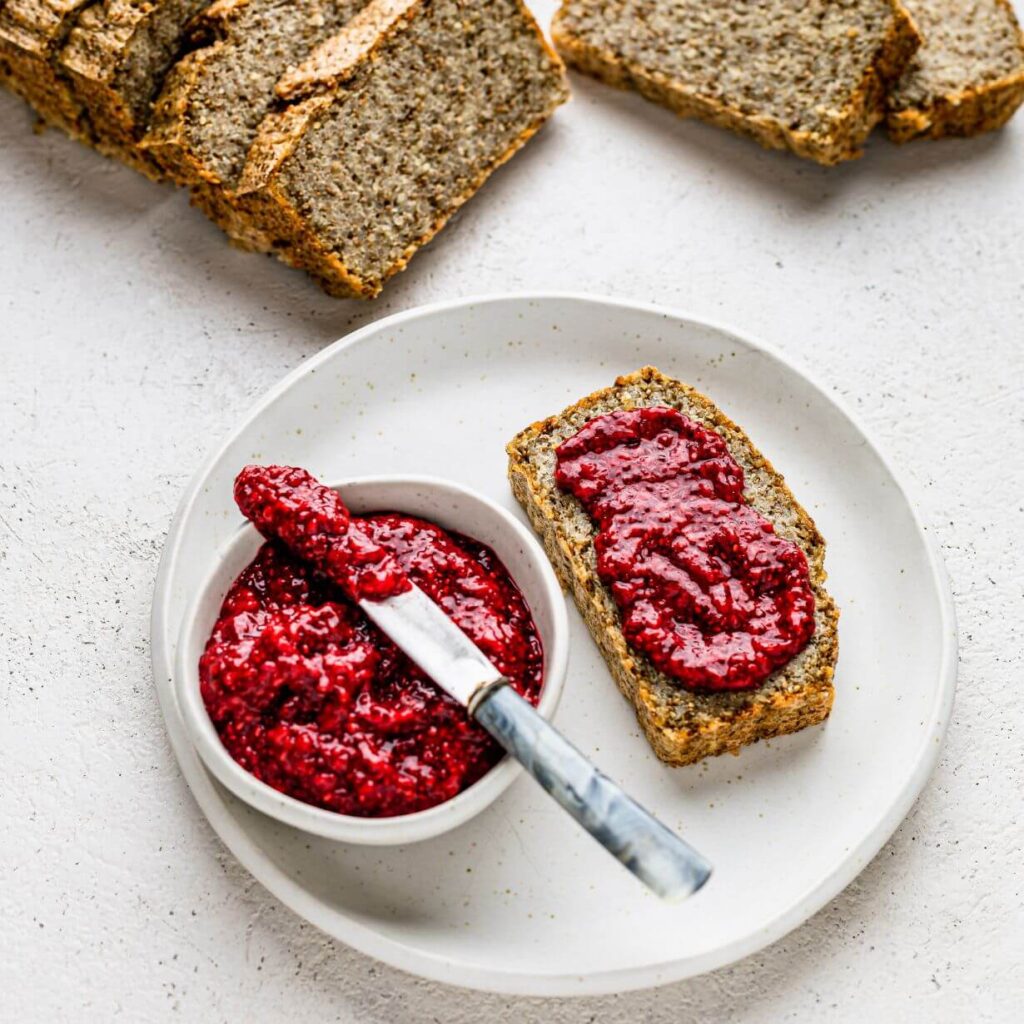
- Nut butter and chia seed jam.
- Classic hummus, sliced tomato and pumpkin seeds.
- Spicy guacamole or smashed avocado and flaky salt.
- Yoghurt, blueberries and cacao nibs.
- Nut butter and banana.
More spreadable delights to try
More ways to enjoy quinoa and chia seed bread
Quinoa and chia seed bread makes a great companion to any recipe where you want to mop up the sauce or dunk some bread in! Try serving it with these recipes:
- Easy chicken curry
- Coconut cauliflower curry
- Creamy celery soup
- Sweet potato soup
- Roast tomato & red pepper soup
More chia seed recipes to try
How to store quinoa and chia seed bread
Store in an airtight container in the fridge for up to five days or freezer for up to one month. If you plan to freeze it, wrap individual slices in plastic-free baking parchment. Then, you can easily remove a slice and pop it straight in the toaster.
I hope you enjoy this quinoa and chia seed bread recipe. If you make it, let me know how it turned out. I’d love to hear what you think in the comments below, or post in The Fertility Kitchen Community.
Quinoa & chia seed bread
Ingredients
- 300 g white quinoa
- 60 g whole chia seeds + 180ml filtered water
- ½ tsp sea salt
- 1 tsp baking powder
- 2 tsp maple syrup
- 60 ml olive oil
- 125 ml filtered water
Instructions
Start the night before
- Place the quinoa in a large bowl, cover with filtered water and refrigerate overnight (or for at least 6 hours) to soak. Drain and rinse thoroughly. Place the chia seeds and water in a separate container, cover and refrigerate overnight (or for at least 6 hours) to make a gel.
To make the bread
- Preheat the oven to 180°C (350°F). Grease and line a 21 x 11cm (900g/2lb) loaf tin with plastic-free baking parchment.
- Place the quinoa, chia gel, salt, baking powder, maple syrup, olive oil and water in a food processor and process to a batter-like consistency.
- Pour into the prepared tin and bake for 90 minutes. Allow to cool in the tin for 5 minutes before transferring to a wire rack to cool completely before slicing to serve.
Notes
- Store in an airtight container in the fridge for up to five days or freezer for up to one month.
")
v2")


comments +